How to Sharpen a Chainsaw Chain (The 5-Minute Method That Actually Works)
A dull chain is dangerous and slow — sharpening takes 5 minutes and costs almost nothing
Here's a truth that saves money and prevents injuries: 90% of chainsaw performance problems are a dull chain. Not the engine, not the bar, not the brand. The chain. A sharp chain pulls itself into the wood, throws chips, and cuts fast with minimal effort. A dull chain makes sawdust, generates heat, forces you to push down harder, and is actively more dangerous because the saw is more likely to kick back.
The good news: sharpening a chainsaw chain is one of the easiest maintenance tasks in the outdoor power tool world. Five minutes, a $10 file, and a little technique. If you own a chainsaw — whether it's a Stihl, Husqvarna, or Milwaukee battery saw — learning to sharpen your own chain is the best skill investment you'll make.
When to Sharpen (The Signs You're Overdue)
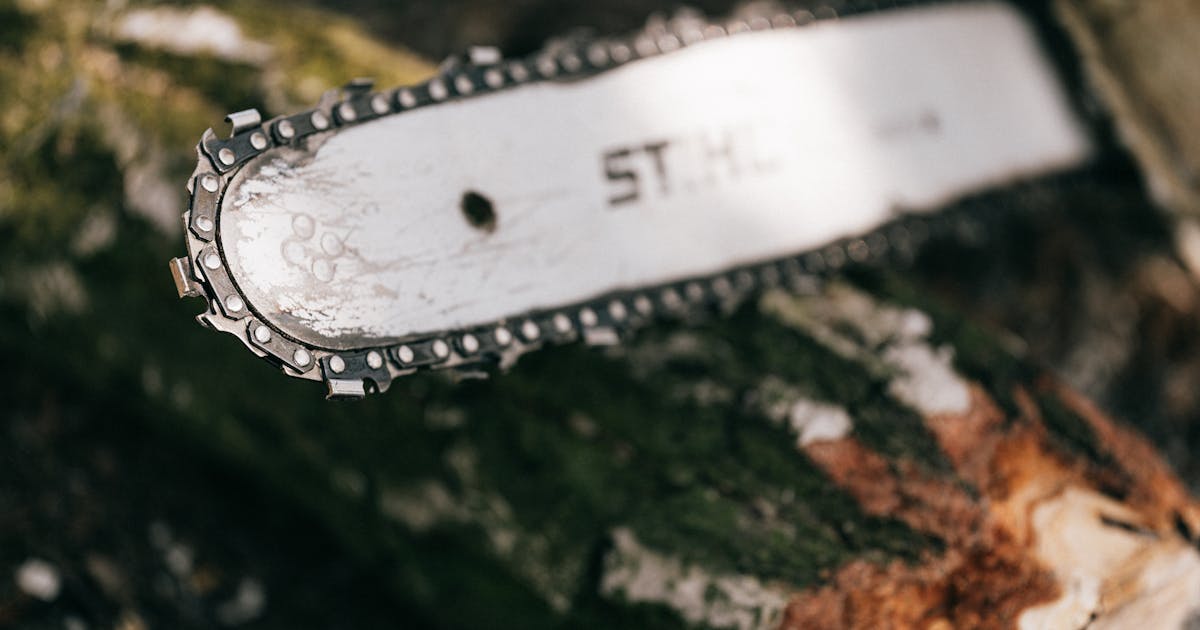
Sawdust instead of chips: A sharp chain throws coarse chips and curls of wood. A dull chain makes fine sawdust. If you see powder instead of chips, you're past due.
You're pushing down: A sharp chain feeds itself into the cut with minimal downward pressure. If you're leaning on the saw to make it cut, the chain is dull.
Smoke or burning smell: A dull chain generates friction instead of cutting. If you see smoke from the cut or smell burning wood, stop and sharpen.
The saw pulls to one side: If your cut drifts left or right, one side of the chain is duller than the other. Sharpen both sides evenly.
The rule of thumb: Sharpen every 2-3 tanks of fuel, or immediately after hitting dirt, rock, or metal. Even one rock hit can take the edge off every tooth that contacted it.
What You Need ($10-$20 Total)
- Round file: Sized to match your chain. Most homeowner chains use a 5/32" (4mm) or 3/16" (4.8mm) file. Check your chain's packaging or manual for the correct size. A wrong-sized file grinds the wrong angles. ($5-$8 for a set)
- File guide/holder: Clips onto the file and sits on the chain, ensuring you maintain the correct angle automatically. This is the tool that turns sharpening from "fiddly guesswork" into "simple and repeatable." ($5-$10)
- Flat file: For filing the depth gauges (rakers) down when they get too tall. Only needed every 3-5 sharpenings. ($3-$5)
- Stump vise or bar clamp (optional): Holds the bar steady so both hands are free for filing. Helpful but not essential — you can brace the bar against a log or workbench.
How to Sharpen: Step by Step
Step 1: Secure the saw. Set the chainsaw on a stable surface with the bar accessible. Engage the chain brake so the chain doesn't move while you're filing. If you have a bar clamp or vise, use it.
Step 2: Find your starting tooth. Mark one tooth with a dab of paint or a marker so you know when you've gone all the way around. Start with this tooth.
Step 3: Set your file angle. Most chains use a 30-degree filing angle (measured from the bar). The file guide has angle lines marked on it — align them parallel to the bar. If you don't have a guide, 30 degrees is roughly the angle of the line already ground into each tooth — follow the existing angle.
Step 4: File each tooth. Place the file in the curved face of the tooth. Push forward with smooth, even pressure — file only on the push stroke, not the pull. Lift the file on the return. Use 3-5 strokes per tooth with consistent pressure. You should see bright, clean metal on the cutting edge after filing.
Step 5: Do every other tooth. File all the teeth pointing one direction first (they alternate). Then flip the saw around (or move to the other side) and file all the teeth pointing the other direction. This keeps your body position consistent and maintains even angles.
Step 6: Check the depth gauges. The depth gauges (rakers) are the rounded nubs in front of each cutting tooth. They control how deep each tooth bites. After several sharpenings, the teeth get shorter but the rakers don't, which means each tooth takes shallower bites. Use a depth gauge tool and flat file to bring them down to the correct height (usually 0.025" below the tooth). Only needed every 3-5 sharpenings.
Common Mistakes
Wrong file size: Using a file that's too small or too large grinds the wrong part of the tooth. Check your chain specifications. The three common sizes are 5/32", 3/16", and 7/32" — and they're not interchangeable.
Inconsistent stroke count: If you give some teeth 3 strokes and others 7, the teeth will be different sizes. Uneven teeth cause the chain to pull to one side and cut crooked. Same number of strokes, same pressure, every tooth.
Filing on the pull stroke: The file cuts on the push stroke only. Dragging it backward dulls the file and rounds over the edge you just sharpened. Lift on the return.
Ignoring the depth gauges: After multiple sharpenings, if the rakers aren't filed down, the chain stops cutting aggressively even though the teeth are sharp. This is the most commonly overlooked step.
When to Replace Instead of Sharpen
Chains don't last forever. Replace yours when the teeth are ground down to the wear marks (stamped on each tooth), when multiple teeth are cracked or damaged, when the chain has been significantly unevenly worn, or when it no longer holds an edge after sharpening. A new chain costs $15-$30 — it's a consumable, not a lifetime purchase. Running a worn-out chain is dangerous and inefficient.
Different Chain Types Need Different Filing
Not all chainsaw chains are the same, and the differences affect how you sharpen them:
Full chisel chains have square-cornered cutting teeth. They cut faster and more aggressively, which is why they're standard on most professional saws. The square corners are also more difficult to file precisely — the file needs to maintain that sharp corner angle. Full chisel dulls faster on dirty wood because the exposed corners chip. If you're cutting clean firewood, full chisel is great. If you're cutting near the ground where chains hit dirt, full chisel will dull in minutes.
Semi-chisel chains have rounded cutting corners. They cut slightly slower but stay sharp significantly longer, especially in dirty conditions. The rounded profile is also easier to sharpen — you're less likely to mess up the geometry with a hand file. Most homeowner saws ship with semi-chisel for exactly this reason. For general homeowner use, semi-chisel is the better choice: easier to maintain and more forgiving of occasional dirt contact.
Low-kickback (safety) chains have extra guard links and modified tooth geometry to reduce kickback force. They cut slower than standard chains. When filing, be careful not to alter the guard link profiles — they're part of the safety design. File only the cutting teeth, not the guards. These chains are standard on most consumer saws under 50cc.
Carbide-tipped chains are designed for cutting dirty wood, ice, or abrasive materials. You cannot sharpen them with a hand file — the carbide is harder than the file. These require a diamond wheel grinder. For most homeowners, if your carbide chain gets dull, it's cheaper and easier to replace it than to sharpen it. Carbide chains cost $30-$50 and last 3-5x longer than standard chains in dirty conditions.
Field Sharpening vs. Workshop Sharpening
There are two approaches to chain sharpening, and the best chainsaw owners use both:
Field sharpening is what you do in the woods, at the job site, or wherever you're cutting. You carry a round file and guide in your back pocket or tool pouch. When cutting slows down, you take 3-5 minutes to touch up each tooth — just a couple of strokes per tooth to refresh the edge. This keeps the chain cutting well throughout the day and prevents you from having to compensate for a dull chain with extra force (which fatigues you and increases kickback risk).
Field sharpening doesn't get the chain perfect. The angles won't be exact, the teeth won't be perfectly even, and you're not touching the depth gauges. That's fine — the goal is maintaining performance, not perfection.
Workshop sharpening is what you do at the workbench with a vise, good lighting, and the time to do it right. This is where you equalize all the tooth lengths, precisely set the 30-degree filing angle, check and adjust the depth gauges, and inspect the chain for damage. Do a full workshop sharpening every 3-5 field touch-ups, or whenever the chain starts cutting crooked despite field sharpening (which means the teeth are unevenly worn).
Bench Grinder Sharpening: When It Makes Sense
Electric bench-mount chain grinders ($40-$120 for homeowner models) use a small grinding disc to sharpen each tooth. They're faster than hand filing and produce more consistent results once you've set the angles. But they have a learning curve and a significant downside: they remove more material per pass than a hand file, which means fewer sharpenings per chain before it needs replacement.
When a bench grinder makes sense: You own multiple saws, you go through chains frequently, you process a lot of firewood, or the chain has significant damage (deep nicks, uneven teeth) that would take forever to correct by hand.
When hand filing is better: You own one saw and sharpen monthly, the chain just needs a light refresh, or you want to maximize chain life by removing as little material as possible.
A reasonable progression: start with hand filing to learn the geometry and develop a feel for when the chain is sharp. After you've hand-filed 15-20 times and understand what a properly sharpened tooth looks and feels like, consider a bench grinder to speed things up. Jumping straight to a grinder without understanding the fundamentals leads to over-ground, shortened chains.
Bottom Line
Sharpening your chain is the highest-value 5 minutes you can spend on chainsaw maintenance. A $10 file set pays for itself the first time you use it by extending chain life and restoring cutting performance. Do it every 2-3 tanks, or any time cutting feels slow. Your saw will cut faster, run safer, and the engine will last longer because it's not being overworked to compensate for dull teeth.