How to Sharpen a Lawn Mower Blade (And Why Your Lawn Looks Torn Up)
A dull blade tears grass instead of cutting it — here's the fix
If your lawn has a brownish tinge a day after mowing, or the grass tips look ragged and torn instead of clean-cut, your mower blade is dull. A dull blade doesn't cut grass — it rips it, leaving jagged edges that turn brown, dry out, and invite disease. Meanwhile, a sharp blade slices cleanly, heals faster, and gives you that crisp, even look that makes a lawn actually look mowed.
Whether you're running an EGO battery mower, a Ryobi 40V, a Craftsman, or a gas Honda — the blade maintenance is identical.
How Often to Sharpen
Every 20-25 hours of mowing. For most homeowners mowing weekly, that's about once a month during the growing season, or 4-6 sharpenings per year. If you're hitting acorns, small sticks, or the occasional rock, sharpen more often.
The test is simple: look at your grass tips the day after mowing. Clean, even cuts = sharp blade. Torn, frayed, brown tips = dull blade. Once you start noticing, you can't unsee it.
What You Need
- Socket wrench or breaker bar to remove the blade bolt (usually 15/16" or 5/8")
- 10-inch mill bastard file ($8-$12) OR an angle grinder with a flap disc ($30-$40 if you don't own one)
- Blade balancer ($5-$8) — a simple cone or wall-mount tool that checks if the blade is balanced after sharpening
- Work gloves — mower blades are sharp even when "dull"
- Block of wood — wedge between the blade and deck to stop rotation while loosening the bolt
Step-by-Step Sharpening
Step 1: Disconnect power. For gas mowers, disconnect the spark plug wire. For battery mowers, remove the battery. Non-negotiable safety step — a blade can spin if the engine starts accidentally.
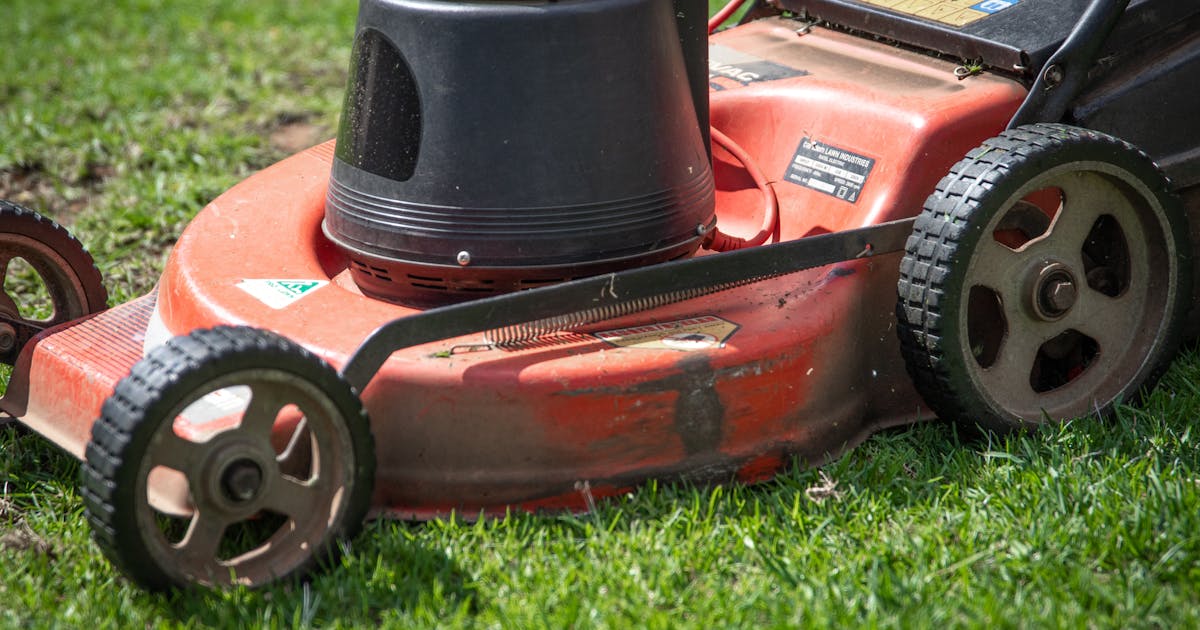
Step 2: Tilt and remove the blade. Tip the mower on its side (carburetor/air filter side UP for gas mowers to avoid oil leaking into the filter). Wedge a block of wood between the blade and deck housing. Loosen the center bolt (usually lefty-loosey, but check — some are reverse-threaded). Remove the blade.
Step 3: Mark the "down" side. Mark which side faces the ground so you reinstall it correctly. An upside-down blade won't cut — it'll just spin uselessly.
Step 4: Sharpen the cutting edge. Clamp the blade in a vise. Using a file or angle grinder, follow the existing bevel angle (usually 30-45 degrees). File in one direction, toward the cutting edge, with smooth even strokes. Remove equal amounts of metal from both ends of the blade. You want a butter-knife edge, not a razor — too sharp and it chips on the first rock.
Step 5: Check balance. Place the blade on the balancer (or hang it on a nail through the center hole). If one end drops, it's heavier — file a bit more off that end. An unbalanced blade causes vibration that damages the spindle bearings and makes the mower shake. This step takes 30 seconds and saves expensive repairs.
Step 6: Reinstall. Put the blade back on (marked side down), torque the bolt firmly (don't over-tighten — typically 35-50 ft-lbs), reconnect the spark plug wire or battery.
File vs. Angle Grinder
File: Slower, more controlled, removes less material. Better for maintaining blades that are lightly dull. Zero risk of overheating the steel (which can ruin the temper). Takes 15-20 minutes per blade.
Angle grinder: Fast, aggressive, easy to remove too much material or overheat the edge. Better for badly nicked or damaged blades. Takes 5-10 minutes. Keep the grinder moving and don't let the blade turn blue from heat — that means you've ruined the temper and the edge won't hold.
For most homeowners, a file is the better tool. It's cheaper, requires no electricity, and it's nearly impossible to mess up.
Mulching Blades vs. Standard Blades: Sharpening Differences
Mulching blades (sometimes called "3-in-1" blades) have a more complex shape than standard lift blades. They have extra cutting surfaces and curved sections designed to recirculate grass clippings inside the deck, chopping them finer before they drop. When sharpening a mulching blade, you need to follow each cutting edge individually — there are usually 2-3 distinct edges per blade end, each with its own bevel angle.
The biggest mistake with mulching blades is only sharpening the main cutting edge and ignoring the secondary edges. Those secondary edges are what chop the clippings into fine pieces. If they're dull, you'll see clumps of half-mulched grass on your lawn instead of the fine, invisible clippings you're supposed to get. Follow every edge that has a bevel on it — if it was sharpened from the factory, it needs to be maintained.
Seasonal Sharpening Schedule
Early spring (first mow): Start the season with a freshly sharpened blade or a brand-new replacement. Your lawn is coming out of dormancy and the first few cuts set the tone for the whole season. A clean cut promotes healthy growth; a torn cut invites disease when the grass is most vulnerable.
Mid-season (monthly): Sharpen every 20-25 hours. For most homeowners mowing weekly, that works out to about once a month from May through September. Set a reminder on your phone — it's the kind of thing you'll forget until your lawn looks bad.
After hitting debris: If you hit a rock, root, sprinkler head, or that piece of rebar you swore you'd mark, check the blade immediately. Even one solid hit can roll the edge or create a nick that tears grass. If there's visible damage, sharpen or replace before mowing again.
End of season: Sharpen and oil the blade before winter storage. A clean, oiled blade won't rust during the off-season, and you'll be ready to go in spring without having to remember what condition you left it in.
How Blade Sharpness Affects Different Grass Types
Cool-season grasses (fescue, bluegrass, ryegrass): These grasses have thinner blades that tear easily. A dull mower blade on fescue shows immediately — the tips turn white/brown within 24 hours. Cool-season grasses also recover more slowly from damage, so clean cuts matter more during summer stress periods.
Warm-season grasses (Bermuda, zoysia, St. Augustine): Thicker blade structure means they tolerate a slightly duller mower blade without showing damage as quickly. But "tolerates" doesn't mean "prefers" — warm-season grass cut with a dull blade still develops brown tips, it just takes 2-3 days instead of one to show. Bermuda in particular needs sharp cuts to maintain that dense, carpet-like appearance.
Thick-stemmed grasses (St. Augustine, bahia): These have stems almost as thick as the blade of grass itself. A dull blade will shred them visibly. If you're mowing St. Augustine or bahia, sharpen more frequently — every 15-20 hours instead of 25.
Professional Sharpening vs. DIY
Most hardware stores and small engine shops will sharpen your mower blade for $10-$20. Is it worth paying someone? Depends on your situation.
DIY makes sense if: You mow your own lawn (so you need it done on your schedule), you own a file or grinder already, and you're comfortable with basic tool use. Total time investment: 20 minutes including removal and reinstallation.
Professional sharpening makes sense if: You don't own any sharpening tools and don't want to, the blade is badly damaged and needs more than a light touch-up, or you want a precision grind that's perfectly balanced from a dedicated blade grinder.
Most homeowners benefit from learning to DIY — it takes 20 minutes, saves a trip, and you can sharpen on your schedule instead of waiting. Keep a spare blade on hand ($15-$35) so you can swap and mow immediately, then sharpen the dull one whenever it's convenient.
When to Replace Instead of Sharpen
Blades are consumable. Replace yours when: the cutting edge is ground past the wear indicators, there are deep nicks or gouges that filing can't fix, the blade is bent (even slightly — a bent blade causes vibration and uneven cutting), or the blade has thinned from multiple sharpenings and feels flimsy.
Replacement blades cost $15-$35 for most mowers. It's worth keeping a spare so you can swap immediately and sharpen the dull one on your schedule.
Bottom Line
Sharpening your mower blade is 20 minutes of work that makes your lawn look dramatically better, extends blade life, reduces engine wear, and saves battery life on cordless mowers. An $8 file and a $5 balancer are the best $13 you'll spend on lawn care all year. Do it monthly during mowing season. Your lawn will thank you by not looking like it was chewed by goats.